
Incorrect operation of the Nest thermostat requires an immediate response. It is necessary to find out the reason why the parameters of the microclimate in the room deviate from the norm, and take action. This article will show you how.
What is the cause of the thermostat not working properly and how to fix it
If the Nest thermostat is not cooling, there is a possibility that you have not connected the wiring correctly. Use the connection diagram and do everything as you need. Do this on the side where the heat pump is located.
Determine the cooling system
First, determine the type of cooling system installed. To do this, check the external system. Pay attention to the sticker. It will say what kind of cooling system you have in your house.
For more information, open a browser, look up the thermostat model number, enter the data into the search engine. Another way is to turn on the heating in the house. If the external system turns on, then you have a heat pump installed.

Re-tag the wires
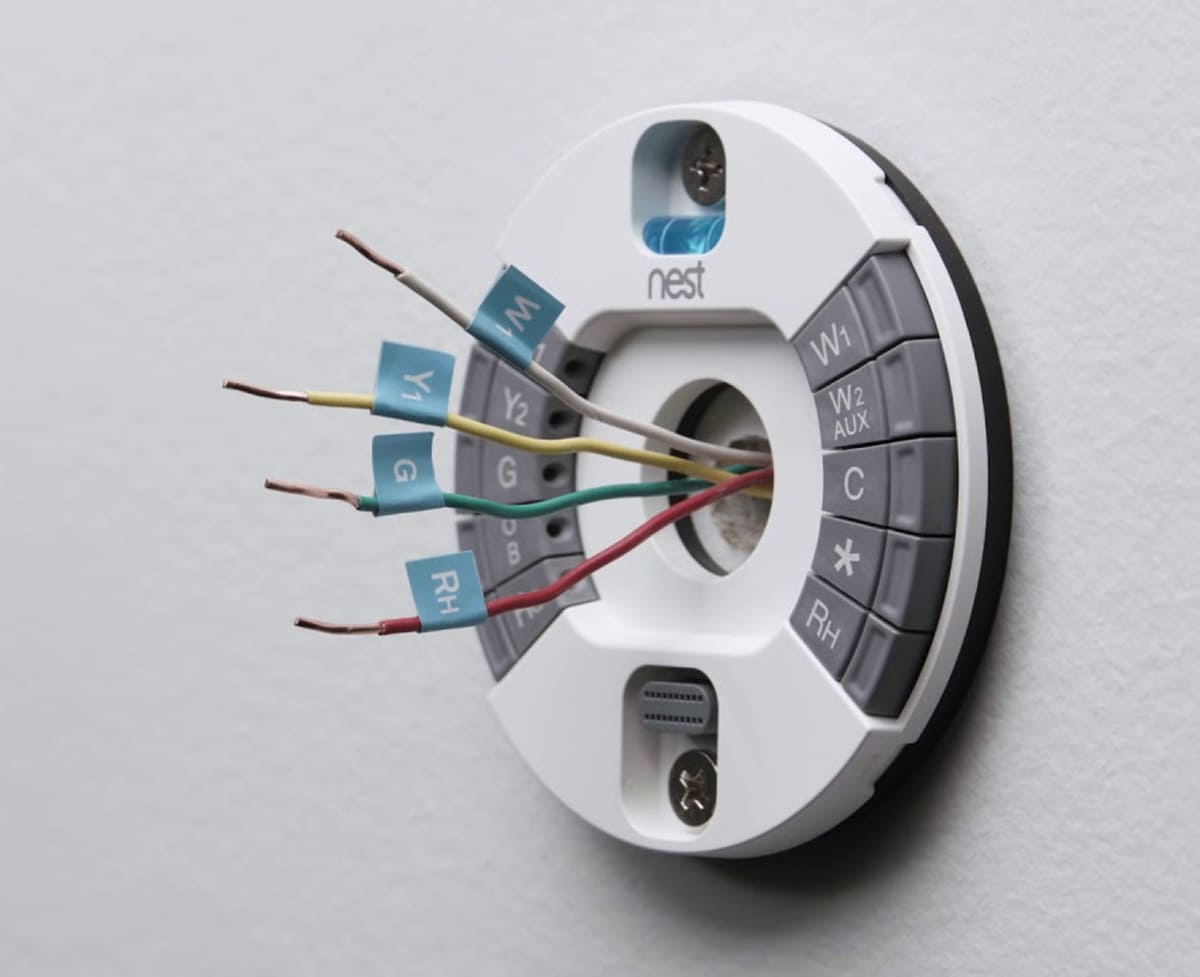
After you have determined the type of cooling, rearrange the thermostat wires. In order not to be mistaken, look at how the old thermostat was connected. It’s good if you have a photo of the wiring of the old device.
If there is no photo, use the Google Home program. It is used to set up the speakers and displays of Nest thermostats. Enter the data there, and the program will automatically determine the wiring connection scheme.
Do everything in accordance with this scheme and check the quality of the thermostat. In most cases, the problem is solved. If it remains, reconnect the thermostat.
Reconnect thermostat
Before performing electrical work, de-energize the network so as not to receive an electric shock. To do this, turn the circuit breaker installed in the apartment or in the switchboard on the landing to the “Off” position.
After that, proceed to reconnect the thermostat. It happens that the device fails and reconnecting helps to get rid of the problem. What you should do:
- Remove the screen from the thermostat, disconnect the wires.
- Connect the wires in accordance with the diagram obtained earlier. Fasten them securely to avoid damage to contacts and increase safety.
Return the screen to its place, turn on the “automatic”, wait until the thermostat loads. If his work is restored, then you did everything right.
Check circuit breaker
If there was an overload in the network, the protection will definitely work to protect you from ignition of the wiring. Look at the electrical panel and see what position the switch is in. If it’s off, turn it to the “On” position. If you don’t know which switches apply to your apartment, do a simple test. In turn, turn the switches to the off position and see if the light in the apartment has gone out or not. Another option is to ask your neighbors what switches go to their apartment. If you have a modern apartment, there will be no problems, because the circuit breakers are located inside the room.
Reconnecting wires
In older thermostats, the wire marked R is connected by a jumper to the RC or RH wires. But in the new Nest devices, each wire has its own port. The red wire marked R must be connected to the Nest RH port. If nothing changes, reconnect it to the RC port.
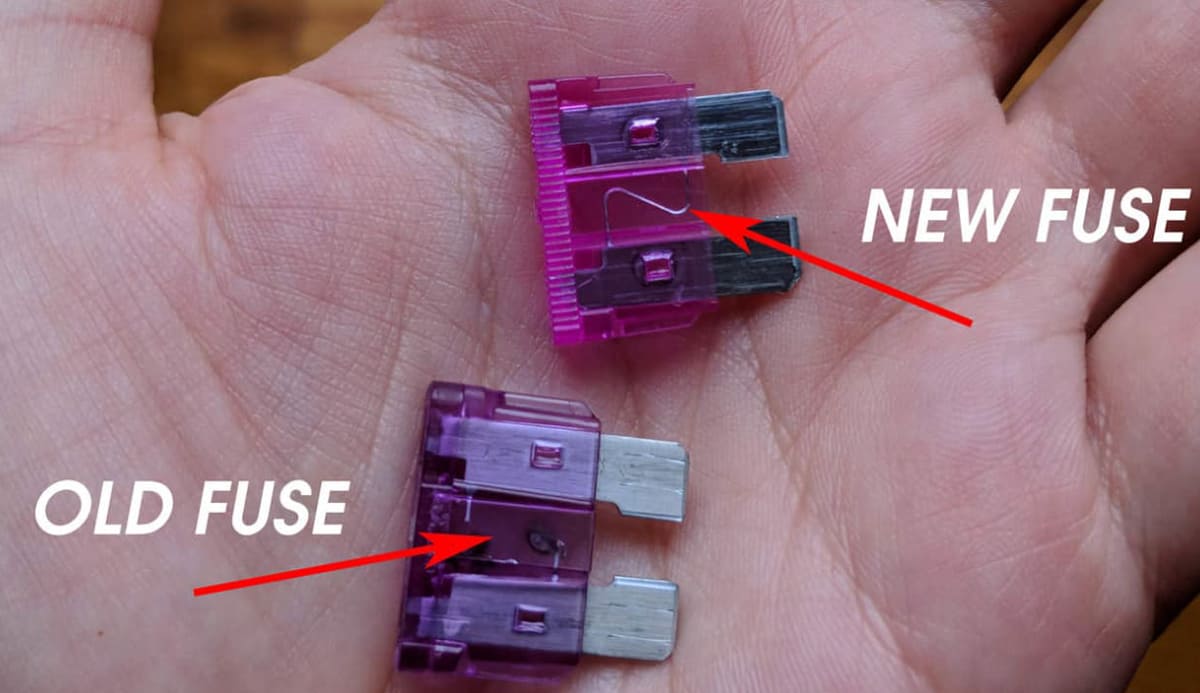
Replace fuse
The internal fuse may blow, causing the thermostat to stop working. Your task is to remove the air distributor cover, dismantle the fuse and replace it with a new one. In order not to look for which one of them burned out, just replace everything. They are inexpensive. If you understand how to check electrical components, perform this operation.
Other Solutions
If after the steps you have taken the thermostat is still not cooling, you can perform certain manipulations that will help you get it back to normal. Start by checking system compatibility. Although Nest is compatible with most systems, it does not work well with some.
Thermostat Compatibility with Cooling System
The cooling system may not be compatible with the temperature controller. For example, the Nest thermostat is not compatible with solid fuel and high voltage systems. Read the manufacturer’s instructions in detail, all this information is indicated there. Buy another thermostat, if the theory is confirmed, return the old one to the manufacturer, if possible.
Reboot the system
The likelihood that the thermostat will start working normally after a reboot is low. But you still have to do it. Turn off the power. This will be enough. Wait 5 minutes and turn on the temperature controller again. Wait for the devices to connect to the home systems.
You can also reboot the system manually. To do this, perform the following manipulations:
- Open the quick view menu, go to settings.
- Turn the thermostat ring to reset or press it to select options.
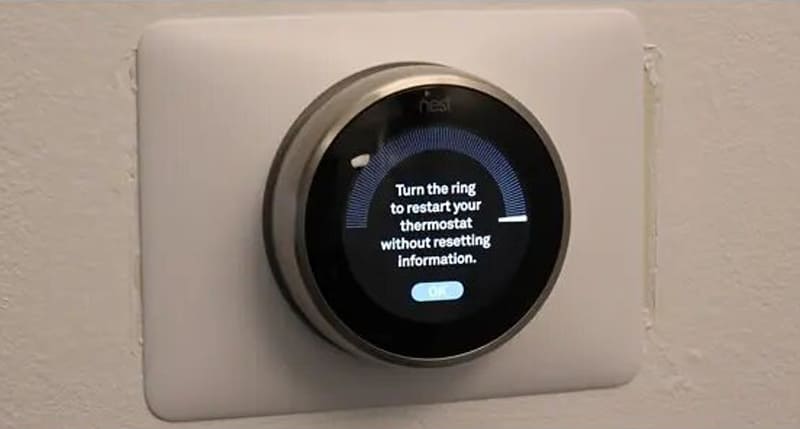
The system will reboot. Evaluate the changes you’ve made. If the problem persists, replace the old thermostat to see if it works or not. We will talk about this in more detail in the next paragraph.
Install an old thermostat instead of a Nest thermostat
The last thing you can do is to replace the Nest thermostat with the old thermostat to see if the problem is in the wiring or the device itself. If the old thermostat works, then something is wrong with the new one. If the old one does not work, then the wiring is faulty. Contact a professional electrician to solve the problem, or do the work yourself if you have a permission group.
If you decide to do everything yourself without a tolerance group, be sure to turn off the electricity first so as not to get an electric shock. Look online for videos on this topic. It clearly shows what and how to do. You can also contact the thermostat manufacturer’s technical support for advice.
If the temperature controller does not work after an unintentional power outage in the house, reset it. Disable and re-enable. Usually there are no problems in the operation of the device, because it automatically switches to work from the battery installed inside. The backup power system maintains the thermostat, which is enough for 2-3 hours. At the same time, to save the charge, the device is disconnected from the wi-fi network.
Many devices require a software update, and the Nest thermostat is no exception. The update will fix the errors that have occurred, and you can again enjoy the temperature inside the house. Also, the update will eliminate problems with disconnecting from the network.
Update the software via the app connected to the thermostat or via the LCD.