
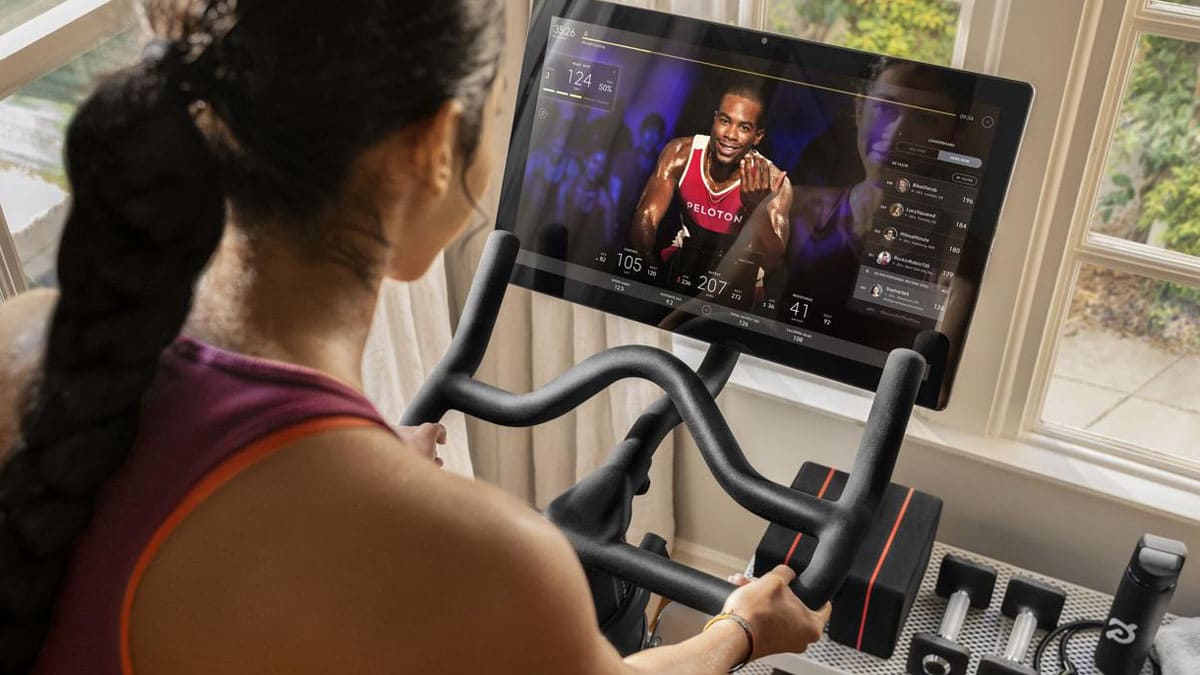
If you bought a Peloton Bike for a lot of money, and the device does not turn on for one reason or another, you definitely should not panic. The fact is that there are a few simple steps that you can take to restore strength and return to riding.
Usually, the problem in such a situation is a rather weak connection that requires reinstallation. After connecting the bike to the network, it is necessary to check the connections directly on the power supply, at the base of the vehicle, under the resistance system, and finally on the back of the screen.
It’s no secret that over time, all these compounds become weaker. Fortunately, they are subject to rehabilitation if you know how to do it. Before contacting the support service, you should definitely read this article.
Which connections require primary testing?
They will be considered in descending order of importance and significance. In fairness, it should be noted that Bicycle and Bicycle + are systems that have identical connections, the exceptions are minor, and they will be discussed later in the material.
Plug and power supply
Here we are talking about obvious things, but they are needed. You just need to make sure that the power supply is activated. This means that the cord is connected to the wall and the power supply.
The first point is extremely simple, you just need to understand that the outlet is working. And if in doubt, you need to try to activate another device. If everything goes smoothly, you can move on.
Then comes the second point, which people often miss. The power cord is supplied with the respective unit, and it can be detached from it, resulting in a complete power failure of the bike.
If the cable is not installed correctly or the cable is tight, the Peloton system will not turn on. You need to see a green light directly on the power supply in case of proper activation.
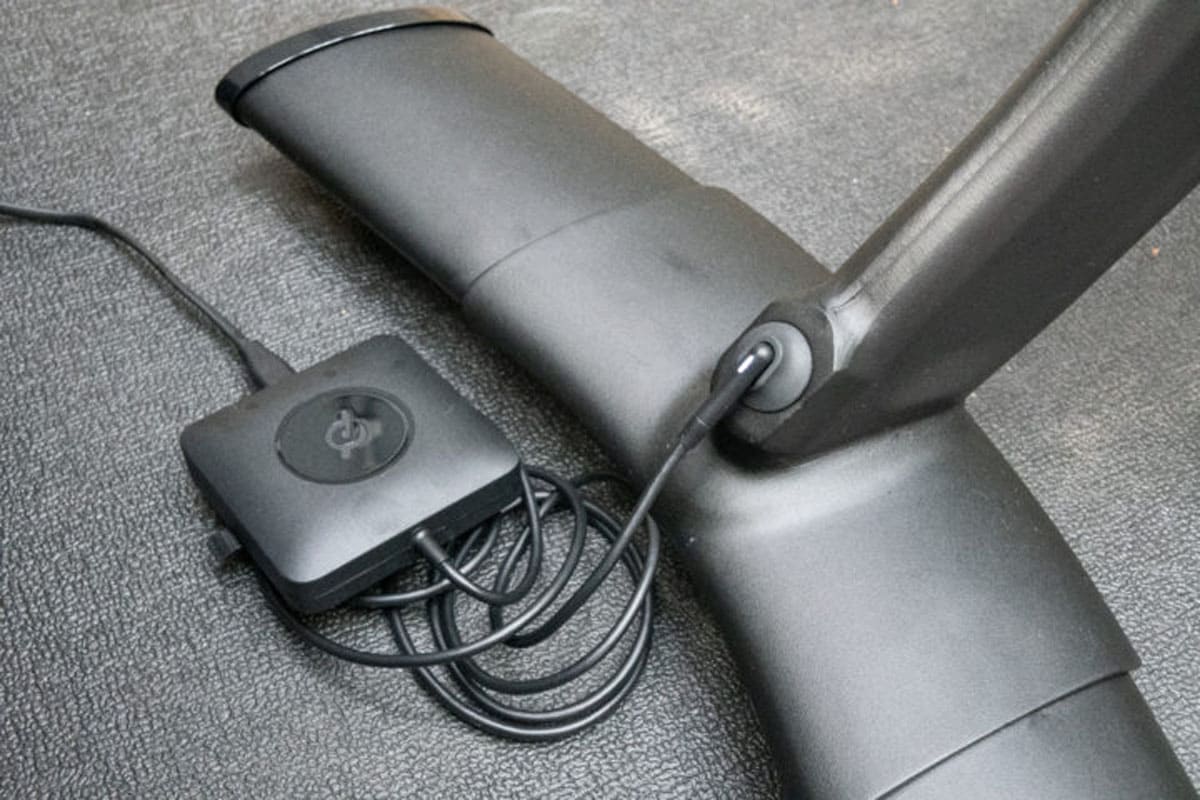
Power adapter at the very base of the bike
The next place to check is the back of the bike. Here the power cord is activated by an adapter in the base. If the adapter is not securely connected, the system will not turn on. It could just be taken out and then reactivated to make sure the system is tight.
If you have a bike+, this adapter has a white light and will glow when connected properly. In the standard version, this light is missing, so you just have to assume that after activation, everything really functions.
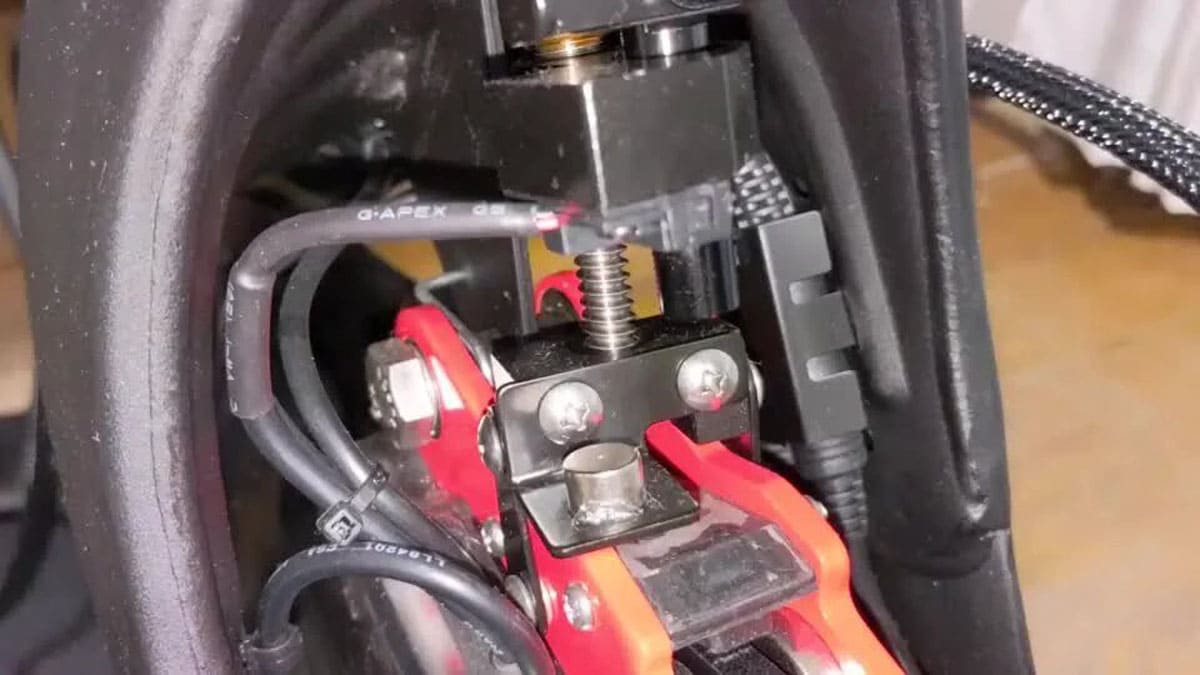
Connection under the resistance mechanism
It’s time to look here as well, to make sure the network connection is highly reliable. Here the system is the most complex, it must simply be seen and restored, it is definitely not worth rushing with this. If you have a child with small hands, then everything will come in handy.
So what can be done in this situation. This is to take a flashlight or use a smartphone flashlight to first look into the resistance system and figure out what’s what. The bike has two connectors on the left side, the bike+ has one UBC-C connection on the right side. Most often, it is with him that this mechanism becomes weaker due to the lack of high-quality cable fixing. In the standard model, both connections are coated and locked in place. In any case, you need to understand that the wires are connected before you start moving forward.
Rear area of the display panel
You will be pleased to know that gaining access to this connection is not difficult. Directly behind the touchpad are wires that connect to the part on the back. You need to double check that they are not disconnected.
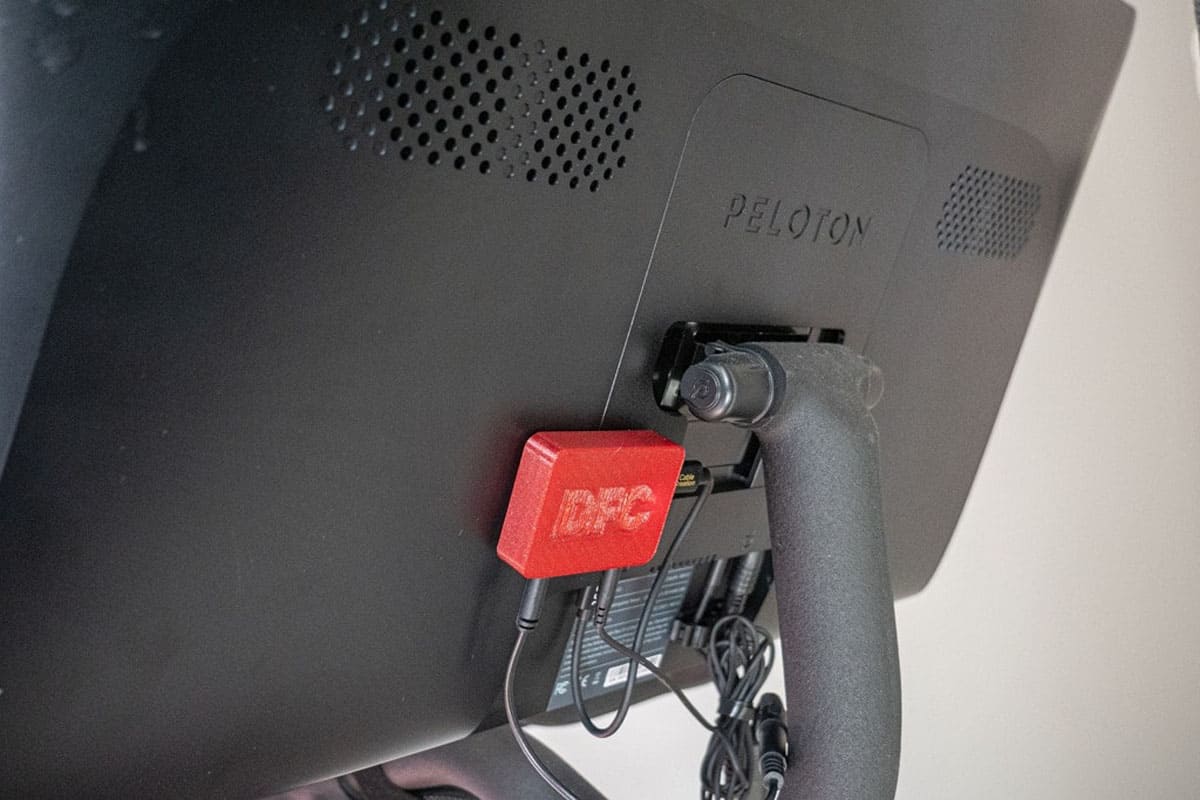
It is not uncommon for small children and pets to pull on them and simply push them aside. If they are not activated, the display simply will not turn on. By examining the back of the display, you should understand that the audio system is connected on the left, while the power supply is on the right.
For owners of a Bike+, the sound should be connected to the top port. In turn, the cable should be located near the middle port.
Brake casing and area above it
This applies to Bicycle+ only. All that is required of the user in this case is to check another connection located on the outer front area of the device, approximately at the same height as the resistance system, directly above the brake casing.
It is worth noting that this is another connection of the UBC-C category, sometimes it is interrupted. There are 2 ports provided here, it is important that the cord is connected to the first system.
Peloton screen enables features
Assuming that all the connections listed above have been checked, and that the user has verified that they are fully seated and that the socket is functioning, you can start turning on the bike. So, on the back panel, the user will find a gray power button. To be more precise, it is located at the top center. It is necessary to click on it and hold for 5 seconds, after this time the user will see how the screen lights up and the download process starts.
Manufacturer’s warranty
It’s worth hoping and believing that it won’t come to that, but just in case, it’s worth noting that the system is covered by a limited warranty for home use. It will also not be difficult to additionally purchase a warranty for operation, which is always recommended for such products. The limited warranty traditionally includes up to a year of coverage directly for the sensor, pedals. The frame, in turn, is covered for 5 years ahead.