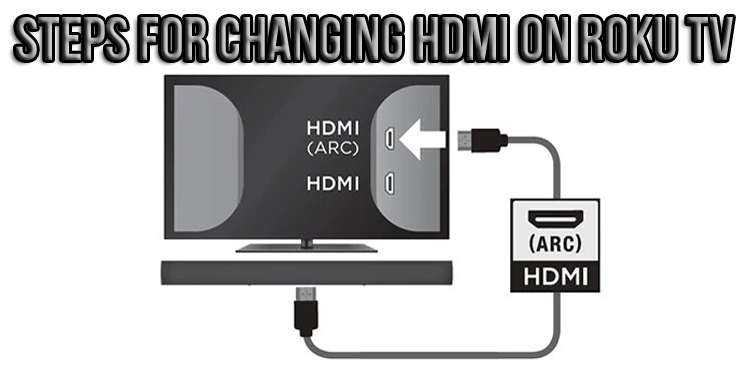
If someone wants to connect external equipment (soundbar, game system or cable box) to Roku TV, then they will be very curious to know how to use it all. Changing the input on such equipment is not too easy. In this case, the actions are not limited to simply pressing the “Source” button on the remote control. Here everything is a little different than on other devices.
Change input on Roku TV using the remote
In order to quickly change the input channel of the TV, you need to use the “Input Settings”.
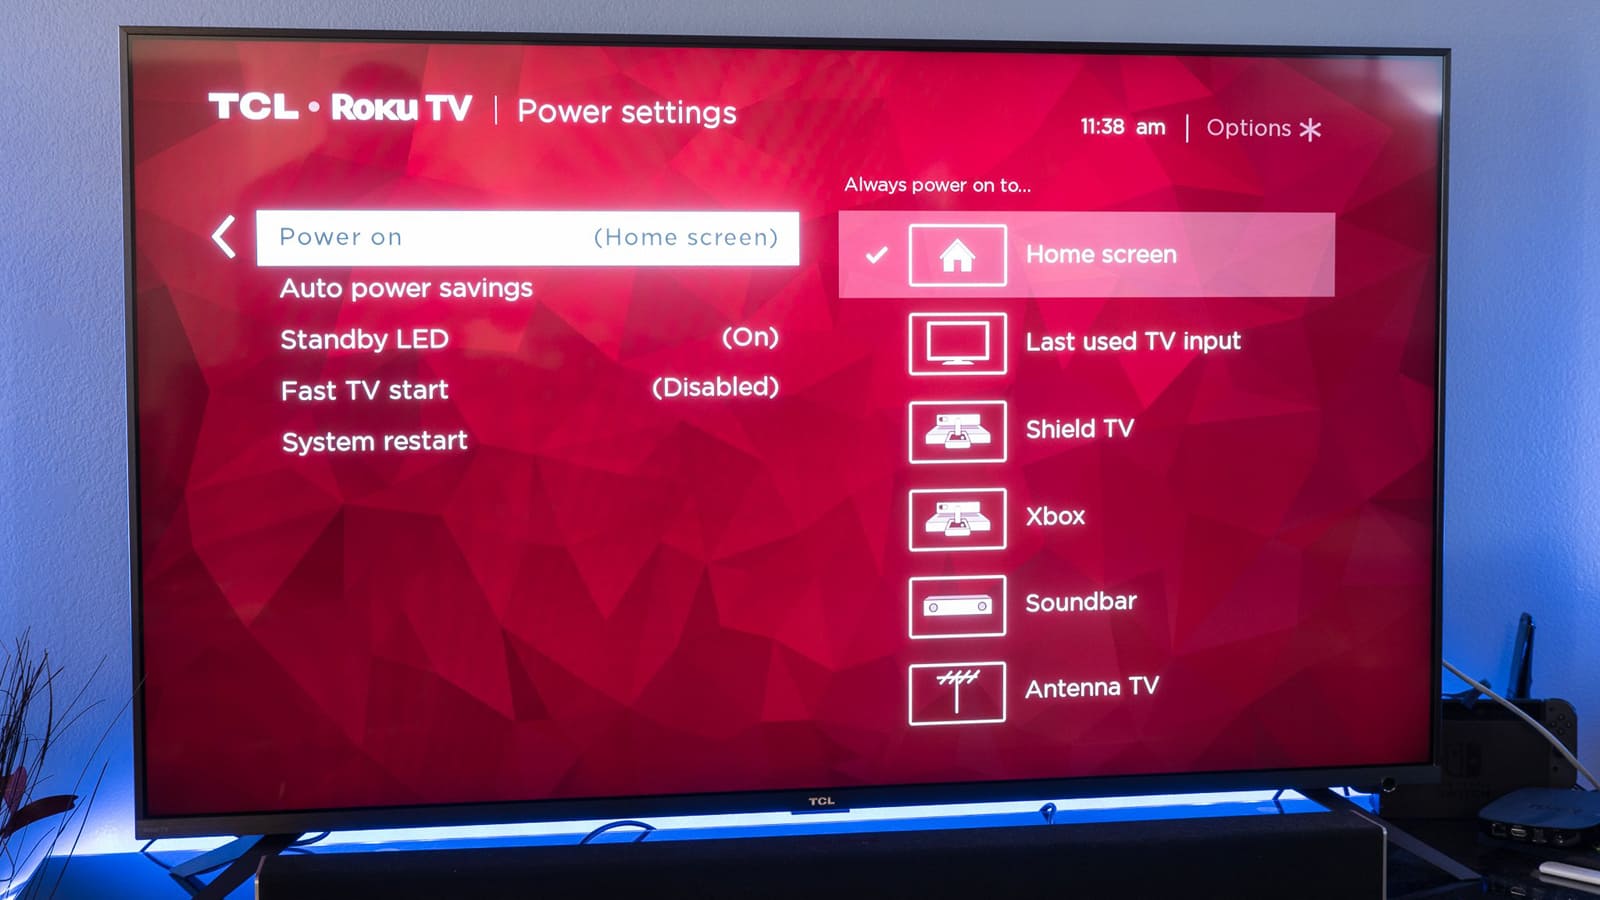
First you need to go to the “Home” tab, then select “Settings”, and then – “TV inputs”. Here you should stop at the “Input Settings” of the channel to which you want to switch. Then it will appear in the form of a tile on the home screen of the television set.
In order to use the new input, it is only necessary to change the input. And before returning to “HOME”, you need to name the newly connected device.
For example, when a cable box is connected to HDMI 2, you need to rename its input to “CABLE BOX” and place it as a tile on the Roku home page.
Subsequently, when using it, you simply need to go from “HOME” to the corresponding function and change the input to HDMI 2, that is, to a cable box. The same should be done for a soundbar, game console, DVD player or other equipment.
Don’t skimp on setup, especially if you have a lot of connected equipment in your home. Doing so eliminates the need to remember the exact HDMI port when looking for it on a daily basis.
You should also remember something about the last input. Once added to the Roku home screen, it will be highlighted as the first heading when returning to the Home function. Then it will be possible to easily organize and group all the available names. This requires a number of steps to be taken.
You must go to the main page, then select the tile to move and press the “*” button. Then you need to stop at the “Move channel” option. The arrows on the remote control will allow you to move the icon to another location. Then use “OK” to save it.
Such actions are required for each new item.
Change input on Roku TV without using the remote
The recommendations suggested earlier perfectly provide the functionality of a TV with a remote control. But if it is absent, broken or lost, there are a number of effective ways to change the input without it.
Using a dedicated button
The most obvious workaround for connecting a new channel is to use a special key located on the receiving machine itself. But first you need to find its location.
Most often it can be found in four main points:
- Lower center of the appliance.
- The right side of its rear panel.
- Left side of the rear panel.
- Bottom and left of the device.
After finding the button, it is advisable to take a closer look and explore other points available here. Some models are equipped with a single one, others have outlets for power or with arrows depicted on them.
Therefore, when using them, the method of changing the channel input will be different.
If there is only one button, then you need to press it 1 time. If there are several, then the one in the center is used.
A menu will appear on the left side of the Roku. You need to press the main button again to go to all its sections. It should continue to be used until the switch input is accessed. Then you need to stop and wait. After a couple of seconds, the TV should change the input.
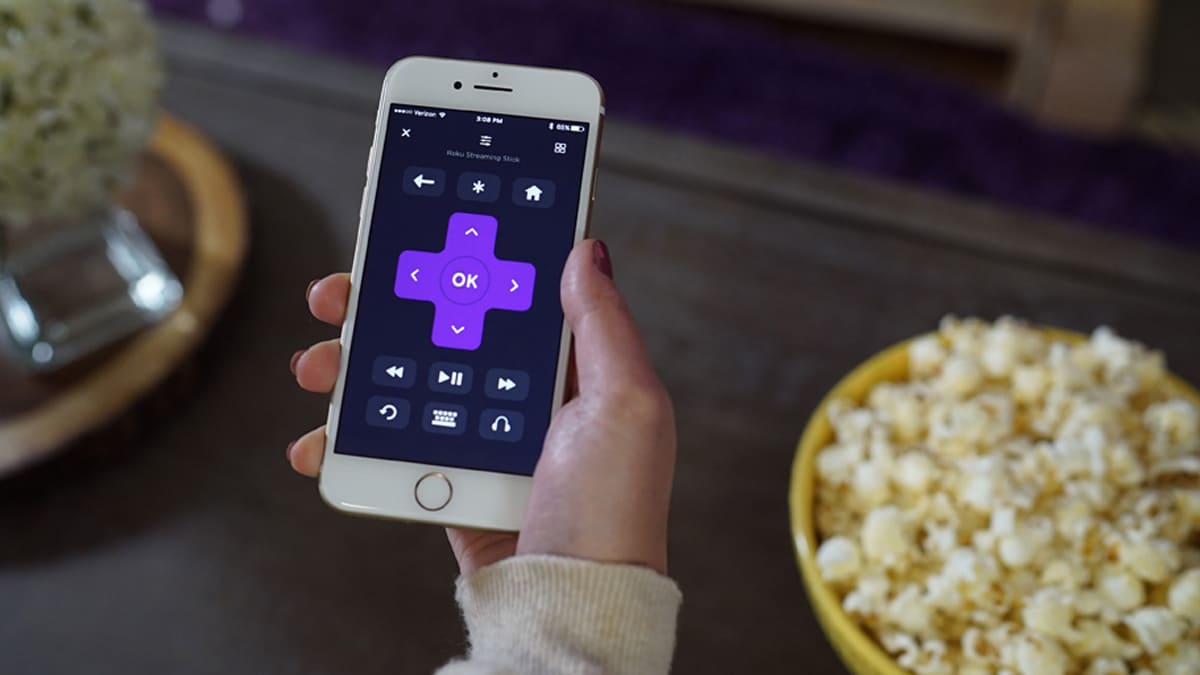
Using the Roku app to replace the remote
It happens that the remote control is lost, and there is no desire to use the buttons on the TV that are too difficult to access. Then, to change the input, you need to use a special application.
You just need to enter “Roku” in the “Google Play Store” or “Apple App Store”, and then download it to your tablet or smartphone. Then you should immediately search for the nearest equipment. The TV will automatically appear in the list. You only need to select it to connect.
First, you should make sure that the gadget is connected to the wireless network that the receiving device uses. If the networks are different, then difficulties can arise.
Once the home appliance recognizes the Roku app, the user can use the phone as a remote control replacement. He just needs to follow the steps that have already been given earlier. Then you can easily change the input (HOME →SETUP→ TV INPUTS→ SET UP INPUT for switchable input).
Missing HDMI 1, HDMI 2, or HDMI 3 on Roku TV
If the main screen is open, and the inputs are not enabled or missing, then you need to use 2 reliable methods. First, you need to configure the input, as described earlier.
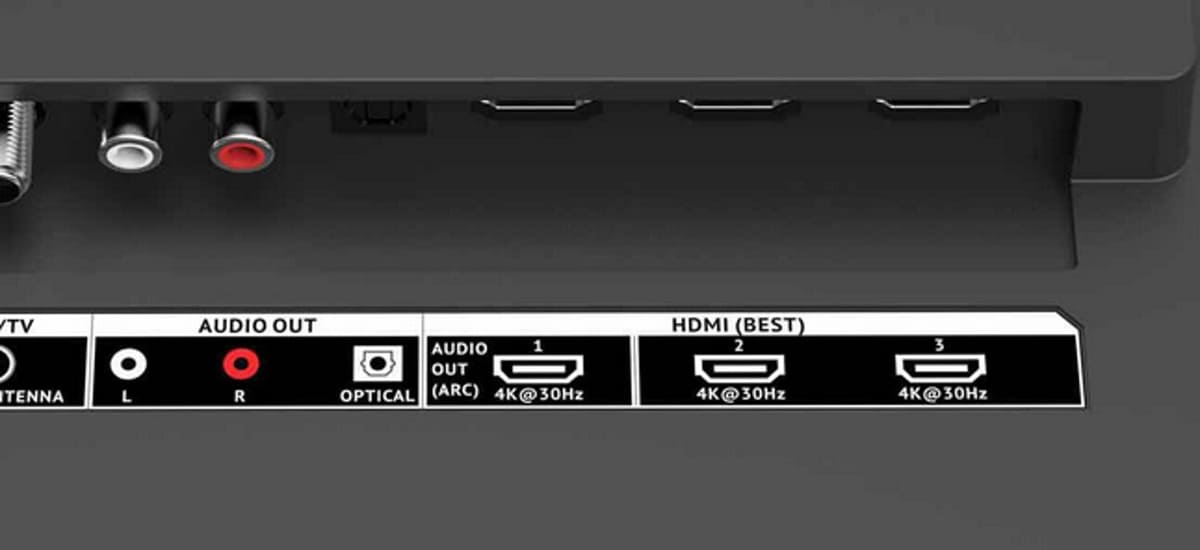
There is another way to solve the problem. It consists in connecting the equipment to a specific input on the back of the TV. If you’re using an Xbox, you’ll need to connect it to the HDMI 3 port. The receiving machine will then automatically find it and add it to your home screen.
If the input has not been manually configured or the device is not connected to a specific input, the channel will not be displayed in the list.