
KitchenAid dishwashers are quality appliances that save time and water when cleaning your kitchen utensils. However, as in the case of other models, the user may encounter unpleasant moments. Often, the stable operation of the machine is overshadowed by leaks. Most often, the problem lies in typical malfunctions that are easy to deal with on your own. This article will detail the main causes of a KitchenAid leak and what to do about it.
Valve failure
This part is designed to supply water to the dishwasher. The component is connected to the water supply, and its control is carried out by the device itself. First, the equipment turns on, then the program selection follows and the control module sends a signal to the filler element. The latter fills the tank and closes. The supply valve not only provides the machine with clean water, but also prevents it from overflowing. It is activated several times per working cycle.
If the user sees a leak in the lower part, then he should check the operation of the water supply valve. This is due to the fact that the element is located just below and is closed by a removable panel. Thus, the failure of the part will lead to the appearance of water on the floor.
- Remove the panel and get to the supply valve.
- Put a towel under the dishwasher.
- Disconnect electrical connectors and water supply.
- Unscrew the fasteners holding the part.
- Install the replacement valve and assemble the equipment in reverse order.
Before repairing the dishwasher, the user must make sure that the appliance is disconnected from the water supply and the mains. This will avoid serious injury, reduce the risk of material damage to yourself and your neighbors.
Deterioration of the diverter seal
The motor switch is located inside the KitchenAid dishwasher. The component is designed to distribute water to sprinklers. In working condition, the part supports the functionality of the elements, including their rotation. This allows you to create streams of water to clean food debris from plates, cutting boards and other items loaded in the dishwasher.
The motor is located below and has a rubber seal. The latter prevents fluid from seeping through the stem. If this element is damaged, then water will fall on the floor. Particular attention should be paid to the dimensions of the engine seal. It is very compact.
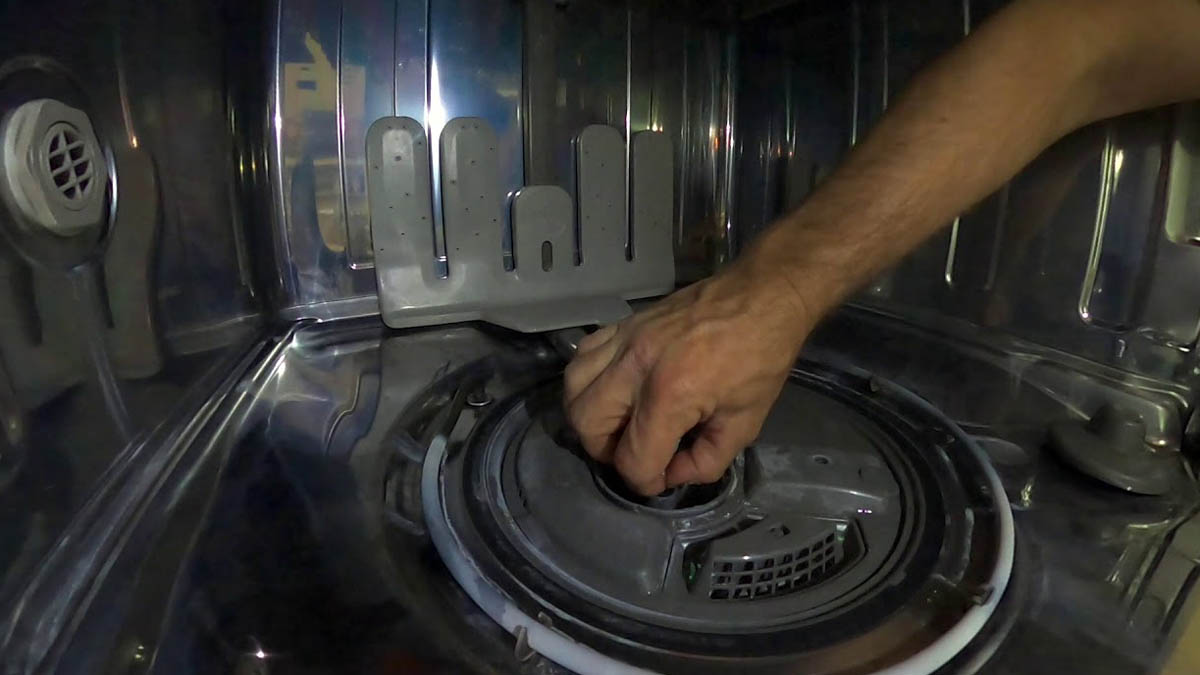
KitchenAid machines are equipped with several sealing elements. At the same time, they are subject to the same wear and tear as the components of dishwashers from other manufacturers. Therefore, deformation of the sealing element is a common cause of puddles on the floor during a cycle. To eliminate the malfunction, the user only needs to replace the engine seal. This will require several steps:
- Removing the assembly that directs water to the sprinklers.
- Opening the lid to gain access to the seal. It sits on a white plastic stem.
- Dismantling the worn part and installing a new one. At this stage, it is important not to confuse the side of the installed component. The seal has a flat side with which the element must be placed downwards.
- Assemble the assembly in reverse order.
Damaged KitchenAid dishwasher door seal
Usually on any device where water is used, several gaskets are provided. The element is designed to seal the wash compartment and prevent any water leakage.
When starting a dishwashing cycle, the door must ensure the safety of the user and prevent water from entering the outside. The seals also prevent the foam from seeping out of the dishwasher. The product is made from rubber. Unfortunately, over time, the component wears out, cracks and can no longer perform its functions properly. Often the gasket is deformed and does not fit properly to the dishwasher body.
Sometimes the user himself creates a problem by carelessly handling the equipment. If the seal has been mechanically damaged, then not only foam and water will seep out, but also food particles. In addition, the rubber product should not be exposed to sharp objects, such as knives. Therefore, the latter must be loaded into the dishwasher compartment with special care.
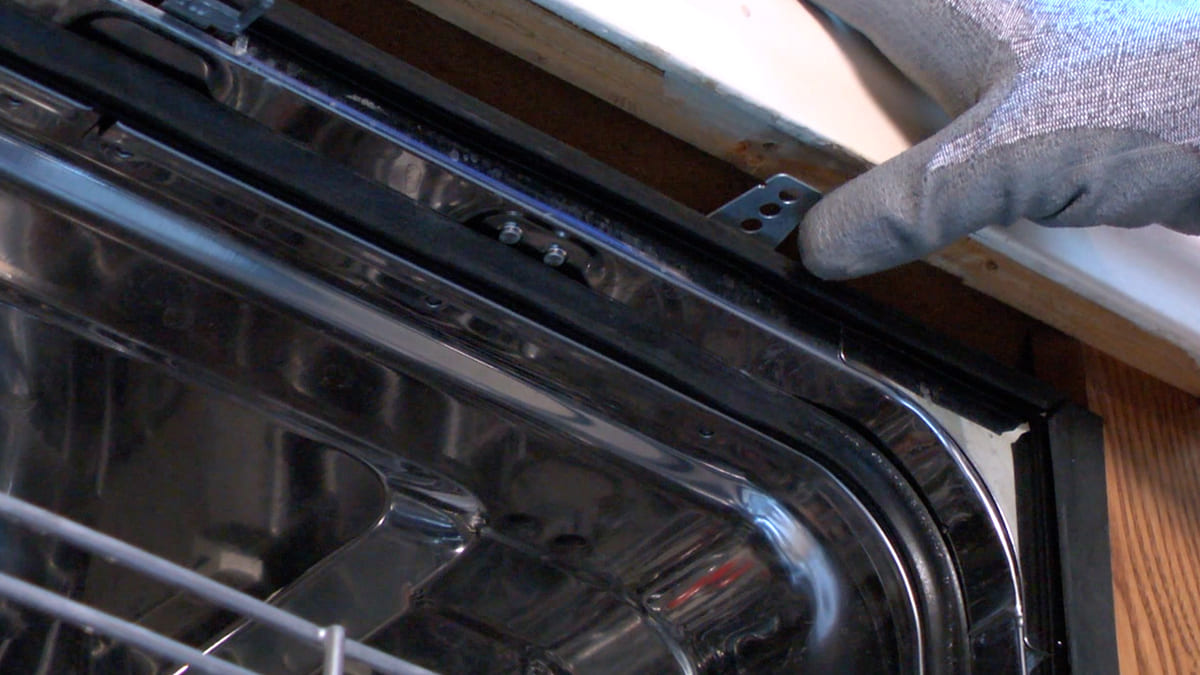
To check the integrity of the dishwasher door seal, you need to conduct a thorough inspection of it. All dirt and food debris will have to be removed. Then the gasket must be examined for defects. If there are tears, cracks or other deformations on the product, this may indicate a leak. The process of replacing a part involves preparation. So, the user needs to remove the shelves to gain free access to the element. Then you need to carefully study the position of the gasket. You need to remember exactly how the product is attached, which parts are directed up and which are down. Next, the gasket is carefully dismantled, and the groove (groove) is well cleaned of dirt.
A new gasket costs a lot of money, so its installation must be done very carefully. The product is placed in the lower part of the groove on one side of the dishwasher. Then the user will have to repeat the action on the opposite part of the technique. Then it remains only to distribute the rubber seal along the entire length of the groove.
Sometimes a gasket replacement is not required. The cause of the leak may be a piece of food stuck between the seal and the machine body, causing the product to deform and a gap to appear. That is why after each washing cycle it is recommended to service the equipment (wipe, clean from contaminants remaining in the compartment). This is directly stated in the user manual.
Problems with the drain pump, hose
The pump is located at the bottom of the machine. Its task is to remove the water involved in the washing process. The device compartment must be cleaned several times during the cycle. The pump pushes the liquid through a hose connected to the sewer. The latter, by the way, can also be the cause of puddles on the floor.
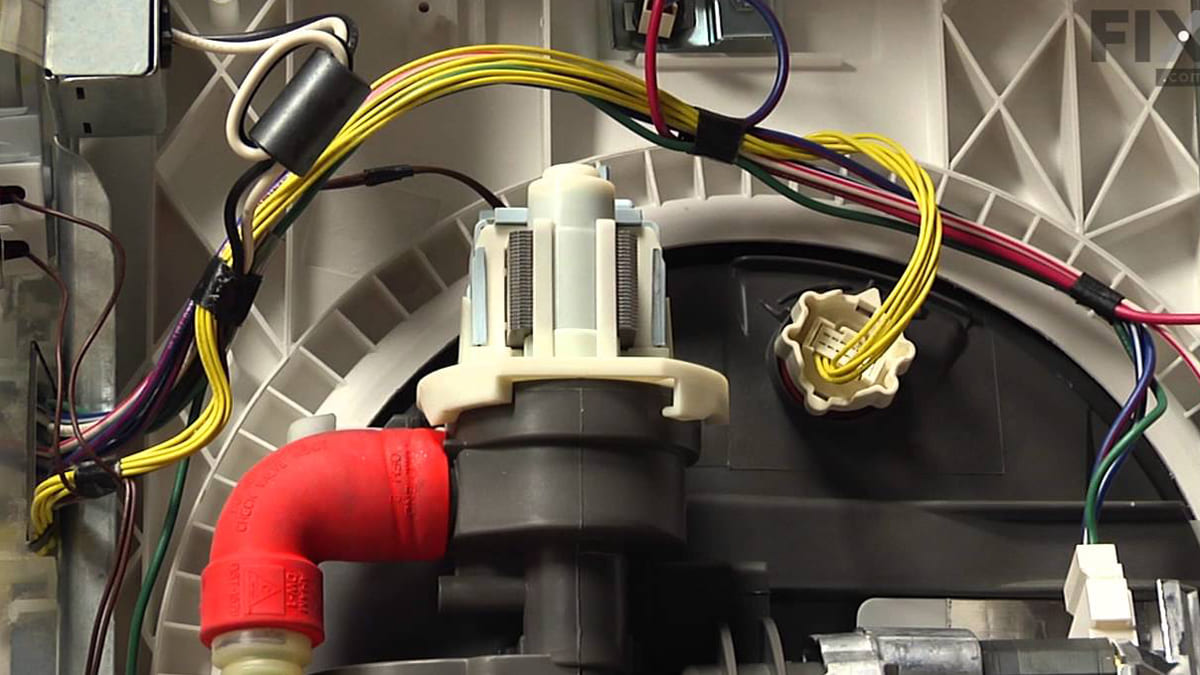
The maximum load on the drain device falls on the final stage of washing. If the user notices that the machine starts to leak towards the end of the dishwashing cycle, then it is worth focusing on the drain load. Usually the cause of the malfunction is damage to the impeller or wear of the seal. You also need to check the hose. The latter may be poorly attached to the drain device or have tears.
To fix the problem, the user will need to diagnose the nodes mentioned above and find the culprit of the troubles. For KitchenAid dishwasher models, repair kits are made from a seal and an impeller. Therefore, repairs will not be a problem.
The component replacement procedure involves several steps. Among them:
- removal of the pumping element. It is located at the bottom of the machine, so the equipment will have to be carefully laid on its side;
- disconnection of electrical connectors, drain hose, dismantling of the drainage pump. Before carrying out the manipulations, it will be useful to put a towel on the floor that will absorb spilled water;
- dismantling of the impeller and sealing element;
- installation of new parts;
- assembling equipment in reverse order. At this stage, it is important not to forget anything. All connectors must be connected as they were installed before disassembling the dishwasher.
The user must pay special attention to the drain hose. Often, after assembling the machine, this component is installed incorrectly, which leads to negative consequences.
Thus, repairing a KitchenAid dishwasher in the event of a leak does not present any particular problems. As a rule, the causes of the malfunction are typical. The main thing is to follow the safety rules when working with the device and take care of the correct assembly of the components. To do this, take a picture of the placement of parts and electrical connectors.