When a dryer appears in the house, life is noticeably simplified. However, if suddenly the device becomes faulty or malfunctions, it causes discomfort and stress for users. Fortunately, in cases of a non-working device, the problem is by no means always associated with serious breakdowns, and then failures are easily fixed on their own at home.
Among the main reasons due to which the dryer does not work, we can distinguish:
- The wrinkle prevention function malfunctions;
- The engine relay is in the on position;
- The “Start” or “Start” button is stuck.
Depending on how long the device has been used, the causes may be more or less likely. Study each one carefully to determine your exact case.
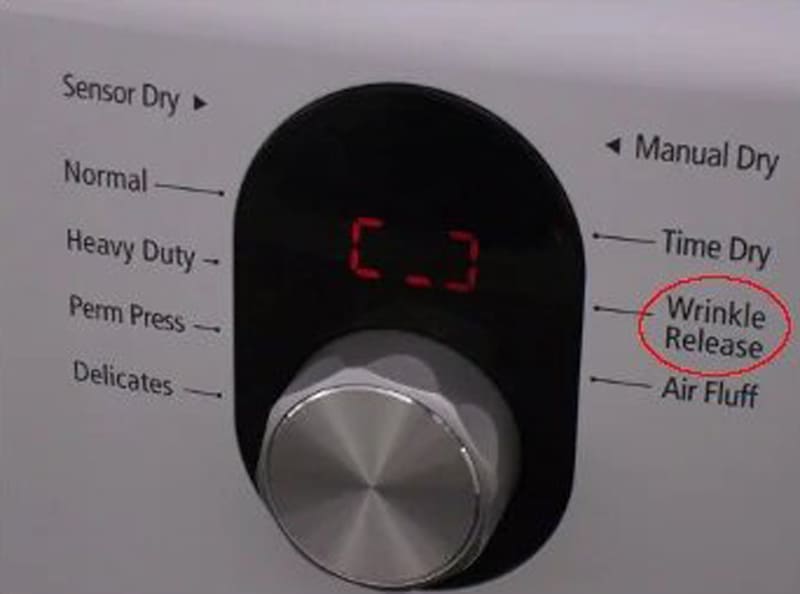
Wrinkle prevention function malfunctions
The least likely cause of a tumble dryer not working, but worth considering as well. The anti-wrinkle feature was originally designed to make life easier for users: instead of wrinkled clothes that would then have to be ironed, they get wrinkle-free clothes that can be put on immediately. In modern machines, it is provided that this function can be turned on and off. This is what may be the reason why the device stopped working altogether.
The fact is that the smoothing cycle occurs after the primary drying of the laundry. Next, the device starts turning the clothes over until you get the laundry. Accordingly, until you open the door, the machine smoothes the laundry. Therefore, if the tumble dryer is not working, check if the crease removal function is enabled.
Since the mechanism is not perfect, you can disable this feature altogether so that such problems do not occur again.
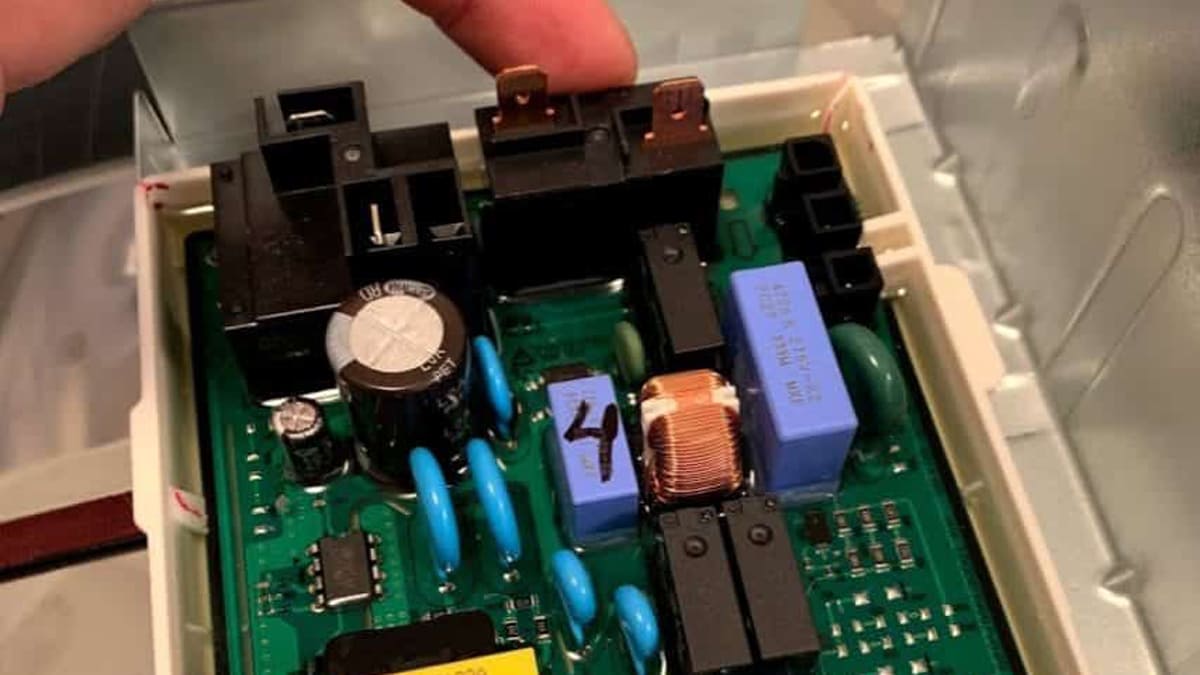
Engine relay is on
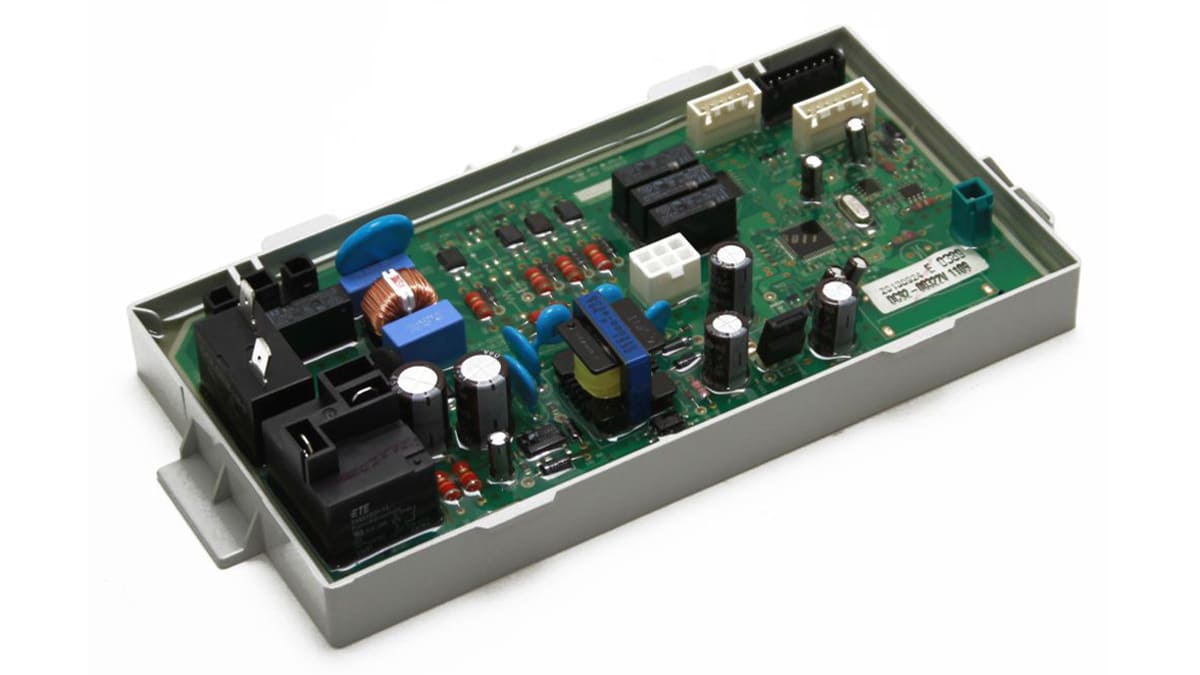
The most likely reason why the dryer won’t start. It happens when a short circuit occurs on the motor relay or the buttons are stuck. For example, the relay may freeze in the on position, due to which it ceases to perceive commands from the control panel.
To solve this problem, you will have to disassemble the device to access the parts. Beforehand, do not forget to disconnect the device from the electricity network. So, first, the dryer must be moved away from the wall so that you can unscrew the back of the case, which is held with screws. Once you have removed the rear housing part, flip the control panel face up: the control relay switch should be in the lower right corner.
The relay is melted or there is soot on it
If you notice soot on the relay, or it has completely melted, check the pin. It is located on the back of the control board. If it also shows signs of fire, then the problem with the idle dryer is the relay switch.
There are two ways to fix this problem. The first is a complete replacement of the control board with a new one. This is a fairly simple procedure. The only thing that is important to pay attention to is the compatibility of the part with your device: make sure that they fit together and only then purchase. For the second method, you will need a soldering iron and certain skills.
If you don’t know how to use a soldering iron or don’t use it very confidently, entrust the work to a specialist or practice first on small items.
Replacing a failed relay
To replace the control board, remove the back of the case and remove the control board. It is recommended that you first take a picture of all the details and their location in the overall mechanism so that the assembly process is faster.
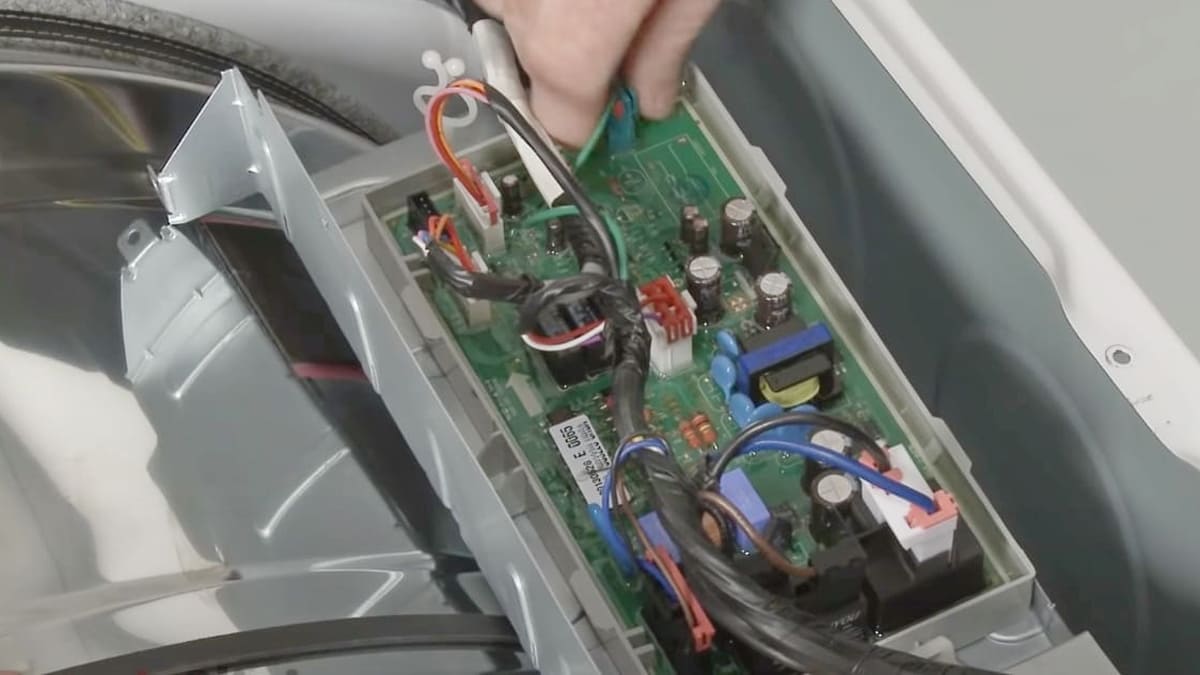
Next, disconnect it from all wires, connectors and other attached items. The contacts on the reverse side of the relay also need to be disconnected: to do this, heat them with a soldering iron, melt the solder and disconnect the relay from the control board with a thin rod. After that, clean the place where the old relay was installed and install the new one. Solder it using solder, and then install all the parts in place.
After the repair is completed, try turning on the dryer, loading it with laundry and putting it on a full cycle. Replacement should solve the problem of a non-working dryer.
Control board replacement
The control board is visible immediately after unscrewing the rear housing of the dryer. Carefully inspect all the contacts and wires: where they connect, what they are connected to, and so on. It is advisable to take a picture of the structure. Disconnect all wires, harnesses and screws from the control board.
Before replacing the old board with a new board, touch the metal case of the device to dissipate static electricity.
Then you can install the board in the same place where the old one stood. It is advisable to replace the old screws with new ones. Start connecting wires and elements to the board, a pre-taken photo will help you with this. Connect the contacts tightly so that during operation they do not cause problems and failures.
After completing the manipulations with the insides of the machine, begin to restore the appearance of the device. Reinstall the top panel to its original position, cover the back of the device with the body panel, and fasten everything with new screws.
Connect the dryer to power sources and test if it works without interruption.
“Start” or “Start” button stuck
The problem is common among devices that have been in operation for a long time. To fix it, you need to unscrew the front panel, on which all the buttons are located. Next, check the health of all contacts and parts. If breakages, deformations and other parts that interfere with smooth operation are detected, replace the connecting elements with new ones.